There’s a lot of different types of magazine out there, Some more prone to leaking than others. I can’t cover all types here but I will go through one that causes me a little more work than the others, And trust me… if you can keep these up and running then any others will be a piece of piss.
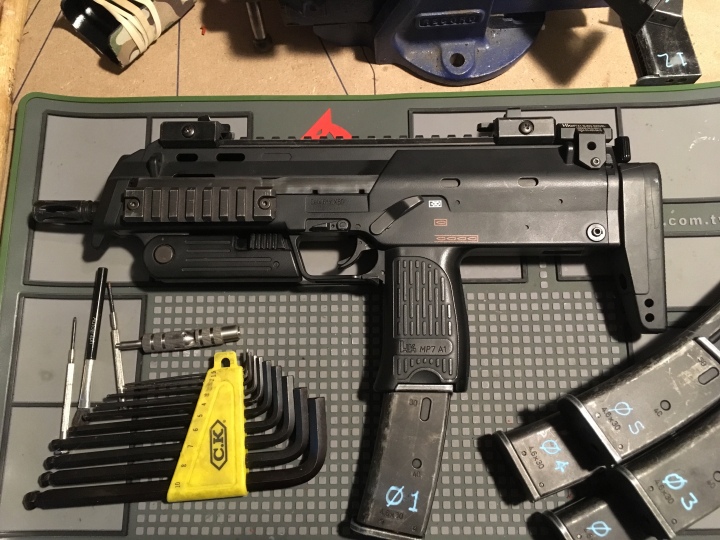
Here, I’ll be covering the maintenance and repair of the Tokyo Marui MP7 GBB magazines. Regarded by some as a flawed design but it’s vital to remember that we ask more of our GBB replicas than they were actually designed to cope with… Running Tokyo Marui replicas on green gas isn’t advised by the manufacturer but with a little extra care and attention there’s no reason why you can’t push those TMs further than they were designed to go.
The key thing to keeping your magazines in working order is to make sure you regularly check them for leaks and fix any leaky mags as soon as they surface.
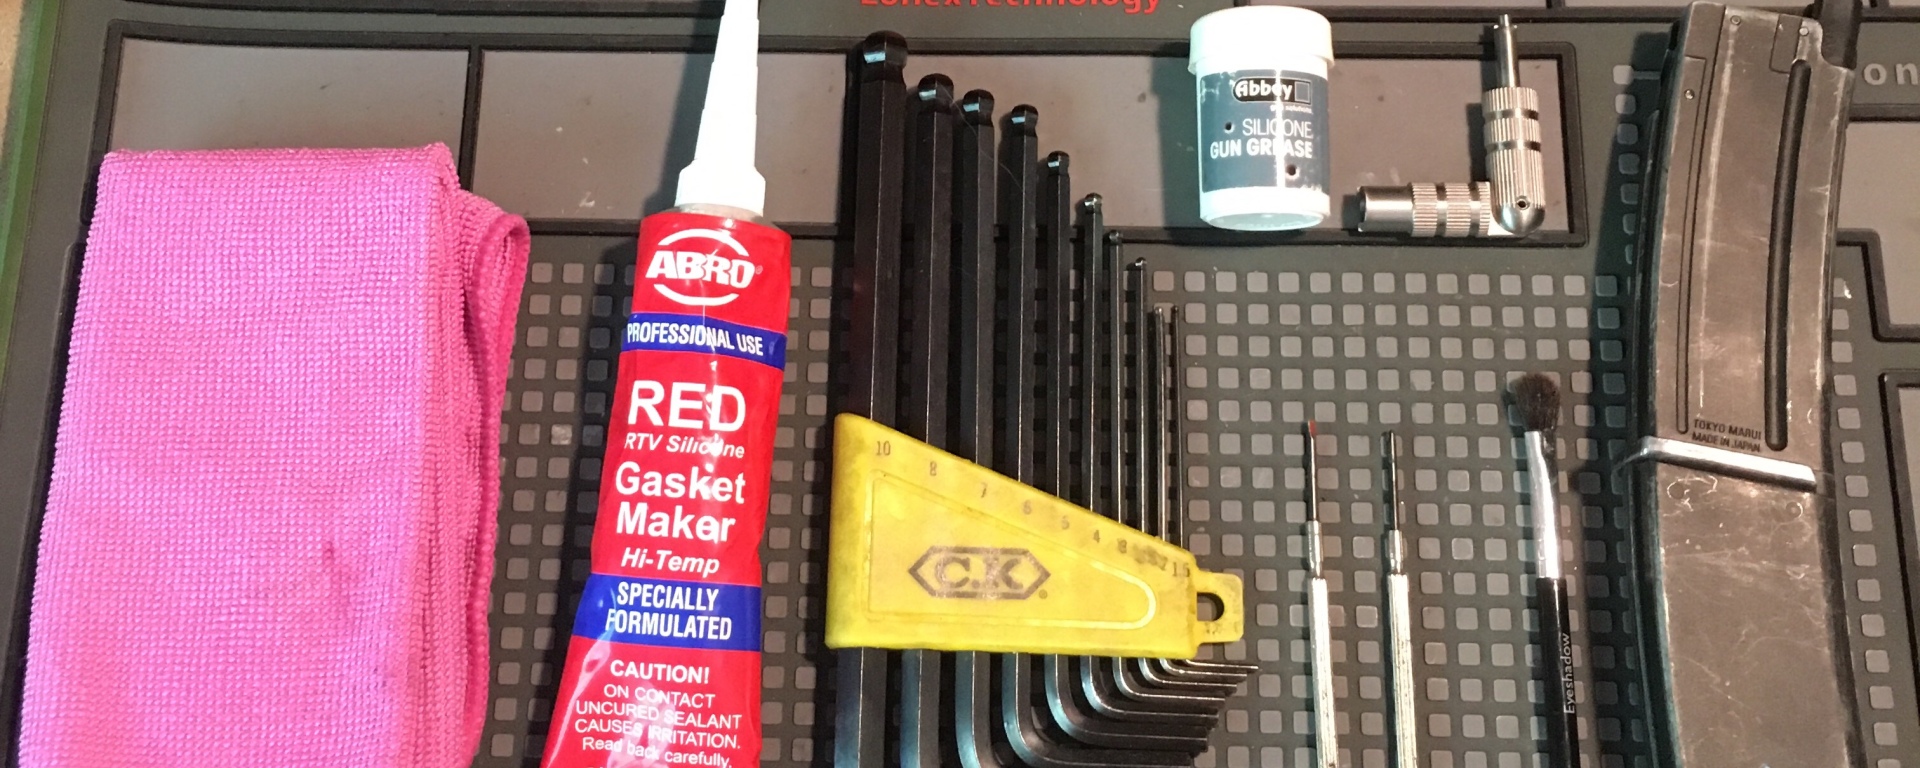
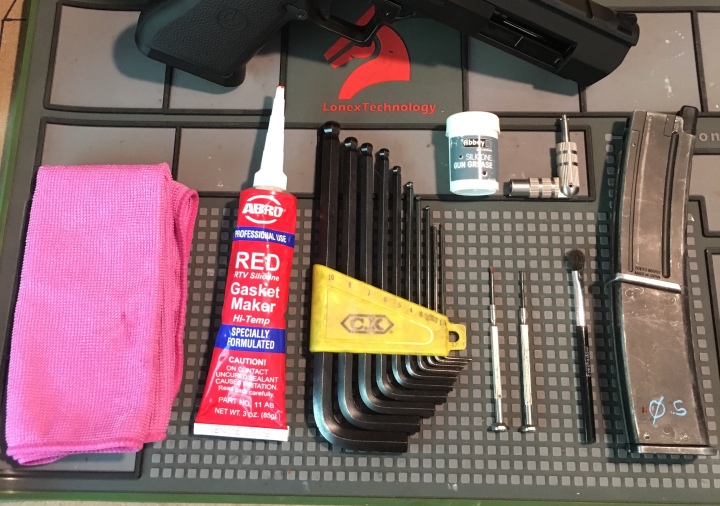
Buying a few bits and pieces will also stand you in good stead and make your life a lot easier. My collection of tools is pretty vast but there’s actually not much needed for the maintenance and repair of magazines, the following tools and products will see you through all of the following steps;
- Gas Valve Key
- High quality metric allen-key set
- Small flat head screw driver
- Small Philips screw driver
- Microfibre cloth
- Abbey Silicone Grease
- Silicone Gasket Maker
- Small Brush
The basic design of the MP7 magazine isn’t far off the design of many other GBB mags, the basic parts being:
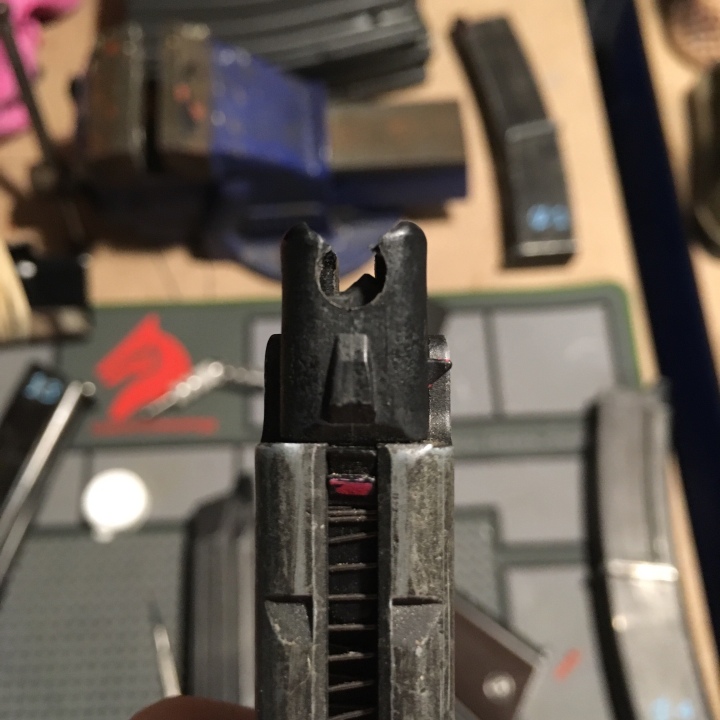
- Gas Router – The rubber part at the top which forms a seal with the blow back assembly, If not fitted correctly or damaged it can cause efficiency issues or worse… A non firing replica.
- Feed Lips – This holds the top round in the magazine, if these become damaged you can experience feeding issues such as double feeds or potentially a magazine that won’t hold ammo.
- Knocker Valve – The main release valve, If not looked after they can leak or become inconsistent, leading to jamming or poor performance.
- Feed Channel – This area holds your ammo, if dirty it can create feeding issues or potentially poor and inconsistent shots due to dirty ammo.
- Main Body – The main gas reservoir, Difficult to damage but a core component. keep it as well maintained as the rest and it’ll serve you well.
- Base Plate – Another hard to damage component, but the same applies.
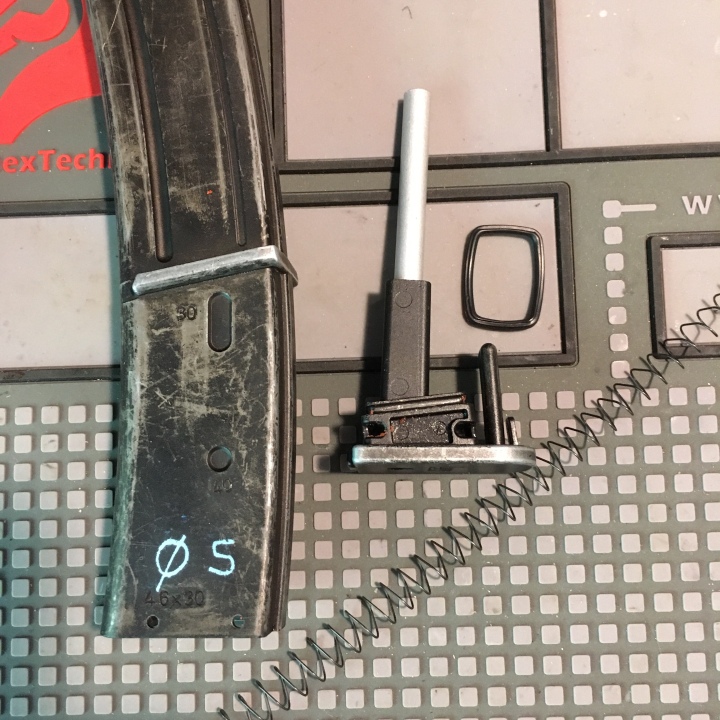
- Fill Valve – The Small inlet valve at the bottom, usually a universal valve across manufacturers, Rarely go wrong but can be replaced if they become an issue.

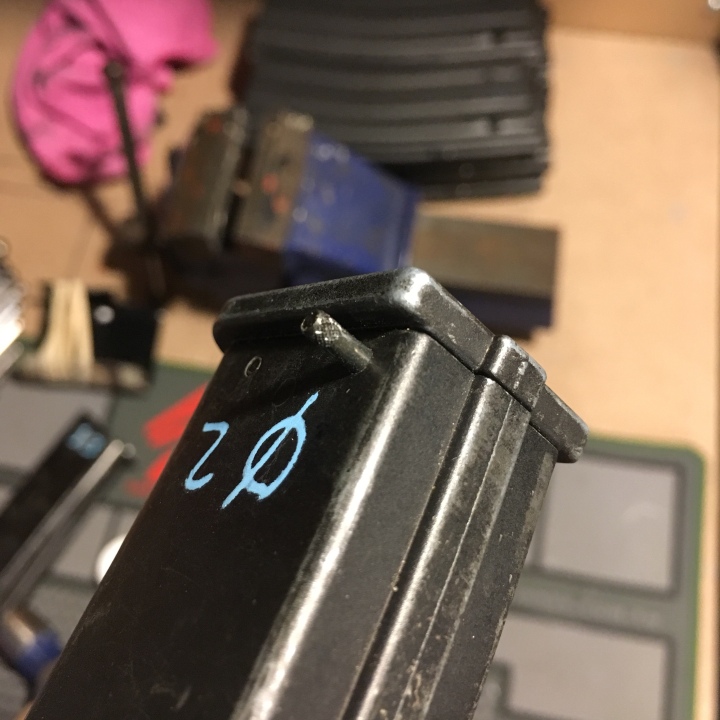
Taking down the MP7 magazine is relatively simple, You can remove the feed lips before you take down the lower half of the magazine, However unless it’s the top half I’m concerned about I usually just remove the whole lower end.
Tap out the pins (making sure to first purge the magazine of any gas) and you should be able to easily remove the whole base plate, being sure to capture the spring before it makes a bid for freedom. I don’t own a pin punch, a small hex or Philips driver will work just as well. You really don’t need much Force either… Generally a firm push is all it takes… If it doesn’t budge, try the other side.
The valve can be removed using a valve tool, However I’ve yet to see a TM valve break under normal usage in many years of fiddling. The O-Ring in the bottom of the mag is of a proprietary shape, But I’m led to believe that a standard o-ring of the right size should work adequately. Again, I’ve not seen more than a handful of o-rings deteriorate to a level needing replacement, Especially if kept properly lubricated.
For many years I’ve simply cleaned and regreased my magazine o-rings, it’s been more than sufficient until recently and it’s still my first step in magazine maintenance. There are more permanent fixes available but I’d suggest the grease route first.
Once the basic parts are disassembled, use the microfibre to remove any debris and grease from the individual items, this will ensure any crap caught in the old grease is no longer going to cause any leaks.
To re-grease the o-ring I usually apply grease to where the o-ring sits, after this I then reseat the o-ring and apply another generous layer around the whole contact surface. Once this is done you can simply put it back together and once gassed, the grease should naturally form an airtight seal along with the o-ring.
Another, More permanent fix is something I’ve been told about on one of the Tokyo Marui Owners groups on facebook… Due to the inherent design of the MP7 mags, The baseplate can become almost unrepairably leaky. If the pins are reinserted the wrong way or bent even slightly, the gas tight o-ring can become too loose to do its job. By sealing the bottom of the magazines with a liquid gasket, You can potentially create a better seal than it came out the factory with.
I’ve opted to use ABRO Red RTV Silicone Gasket Maker, It’s relatively cheap and I’ve used it in the past for sealing RC IC Engine silencers and other little projects.
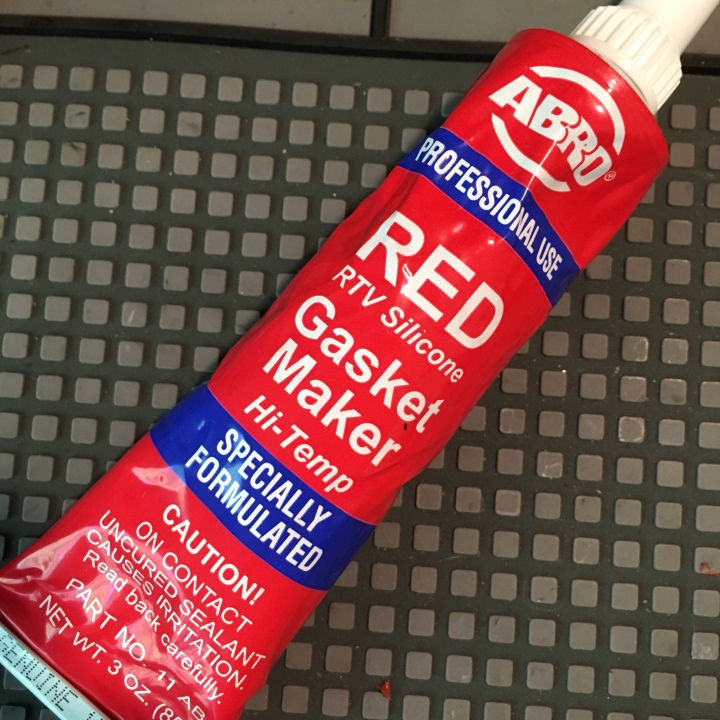
Another benefit of this is that being Red your able to easily see where it’s been applied, this will help should you need to remove it at a later date.
To apply the gasket maker I simply follow the same process as the one above for grease… firstly by ensuring all parts are clean and then beading a line around where both parts join. I do also seal in the o-ring with a thin layer underneath, this provides the bulk of the seal with the gasket filling in those tiny, difficult to judge gaps.
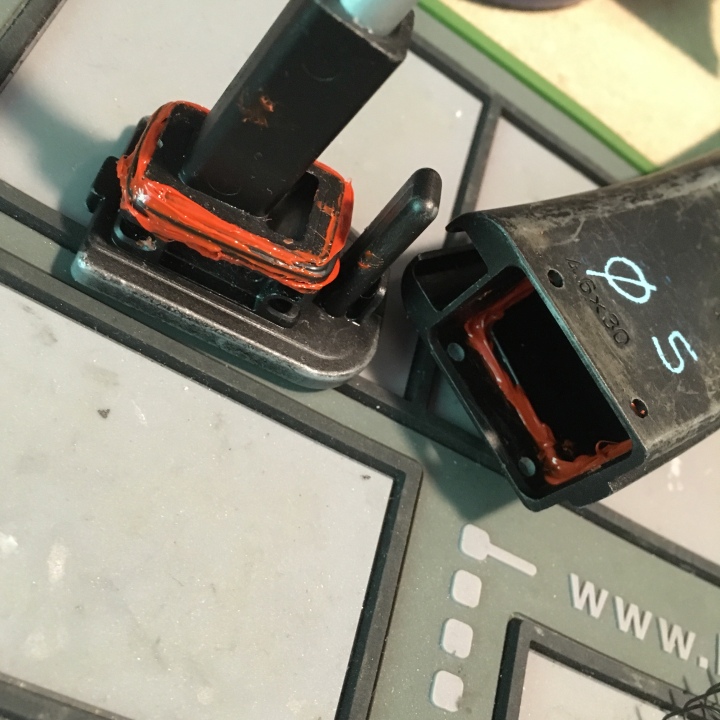
Allow the gasket maker to form a slight skin, this will take a few minutes… And then reassemble the parts together. One vital step… Do not rush and test your magazines straight away. Give it an hour or so for the gasket to form a proper seal. Once this has happened, fill with gas and you should hear absolutely nothing… No hissing or whispers of escaping gas, just the reassuring silence of a gas tight magazine.
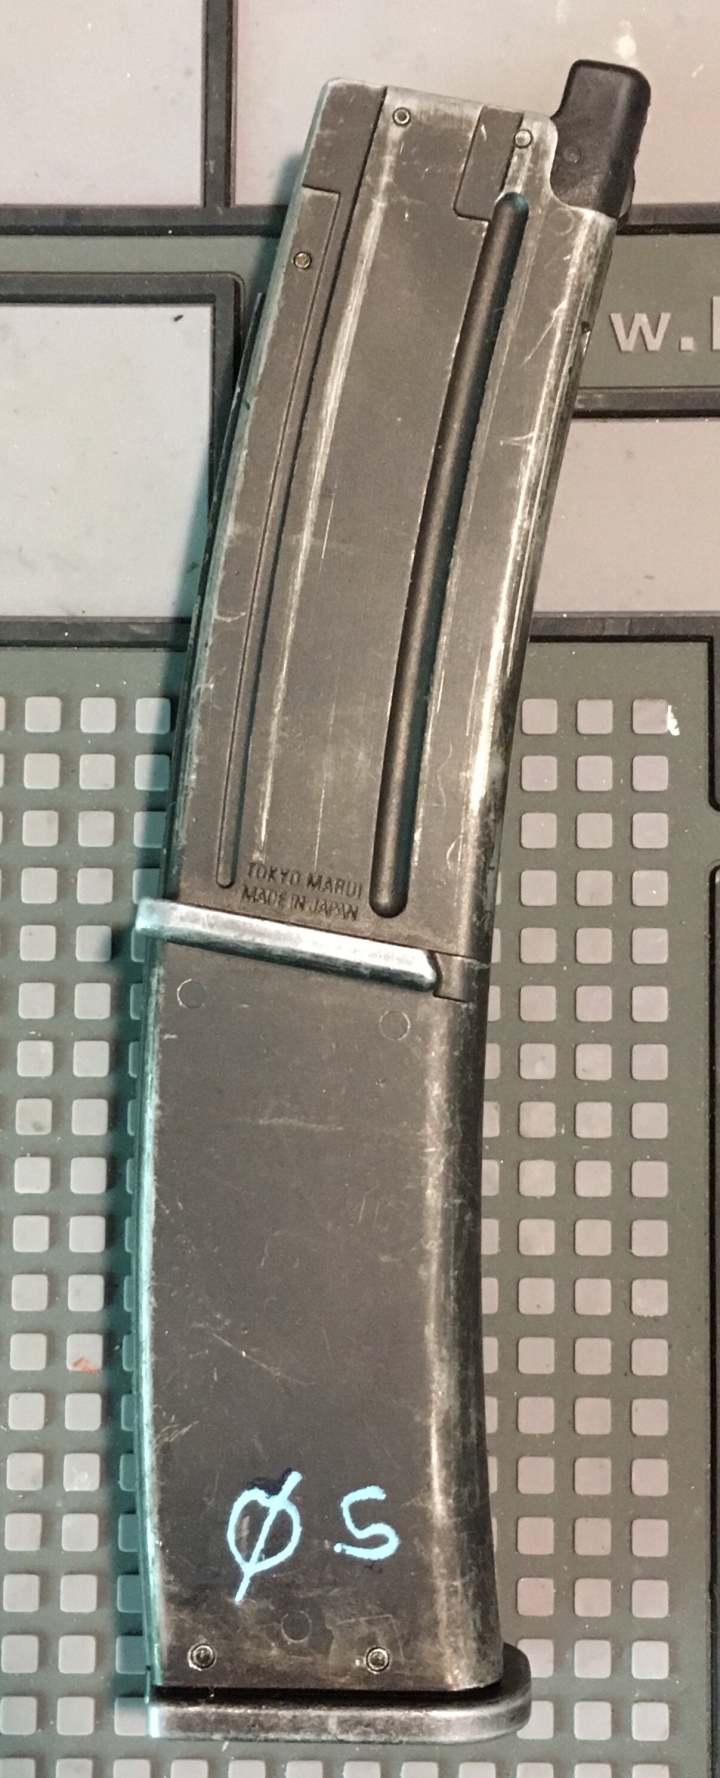
Oh, And marking your magazines will help identify any troublesome offenders… A posca/sharpie paint pen in light blue will give it an authentic look. I also mark up the pins to both remind me which end to not knock out and as an indicator of which ones have been sealed with gasket maker.


Great Instructions. Gonna fix my 5 leake Mags with this.
Thank you very much! 🙂
LikeLiked by 1 person